Showing posts with label butter cake. Show all posts

Purple sweet potato butter cake

It is almost like an alarm clock in the body. I would naturally crave for some butter cake or poundcake like bakes time to time. Do you get that too? Yes, I love chiffon, I love tarts, I love pastries, but somehow the lure of buttery soft cake keeps coming back for more! Although having the good old traditional butter cake is the best, I still enjoy explore and experimenting different ingredients being incorporated to it. And this time is none other then one of my favourite sweet potato...not just any, but that sweet and pretty purple sweet potato. And so Purple Sweet Potato Butter Cake is born!
The addition of the root vegetable has made this cake not only more moist, it also gives off that sweet potato aroma and flavour when you eat it, especially when it is warm. So love! If you love pumpkin too, you can try it with that. But keep in mind that pumpkin has more water content verses sweet potatoes, so the result might end up a wee bit different perhaps.

For now, let's look at this Purple Sweet Potato Butter Cake recipe and see what it consist. :)

Ingredients for Purple Sweet Potato Butter Cake (makes a 8" by 8" square)
150 g sweet potato steamed + 50 ml coconut oil 
  •  Blend the two together until smooth. Set aside for use later

Egg Yolk Batter
5 egg yolks (~73-75g)
60g caster sugar
200 g salted butter at room temperature (Or unsalted butter with 1/2 tsp salt)
200 g cake flour

Egg White Batter
5 egg white
100 g caster sugar
1 tsp fresh lemon juice


  • Preheat the oven to 155C. Prepare a steam bath in the bottom rack so you can so a steam bake later. Grease and line a 8" by 8" square pan with parchment paper. Set aside for use later.
  • In a large mixing bowl, add in the yolks and caster sugar. Start whisking till it thickens and doubled its volume.
  • Next place the softened room temperature butter in, whisk it in in gently to the yolk batter. The batter will be thick and creamy.


  • Now you can add in the blended sweet potato and coconut oil puree. Again, give it a good whisk to combine thoroughly.
  • Last, add in the sifted cake flour. Whisk well again.


  • Next, whisk the egg whites in another mixer bowl. Add in the lemon juice  and then gradually the caster sugar and continue to beat till stiff peaks.


  • In 3 separate portions, add in the egg whites to the egg yolk batter, folding gently each time and careful not to deflate the egg whites.


  • Pour the batter into the prepared baking pan, spread it evenly. At this emakent, you can choose to bake it as is or put on the extra sweet potato cream topping swirls.

Swirl Topping (optional)
100 g sweet potato + 60 ml heavy cream
  •  Blend the two together until smooth. Set aside for use later


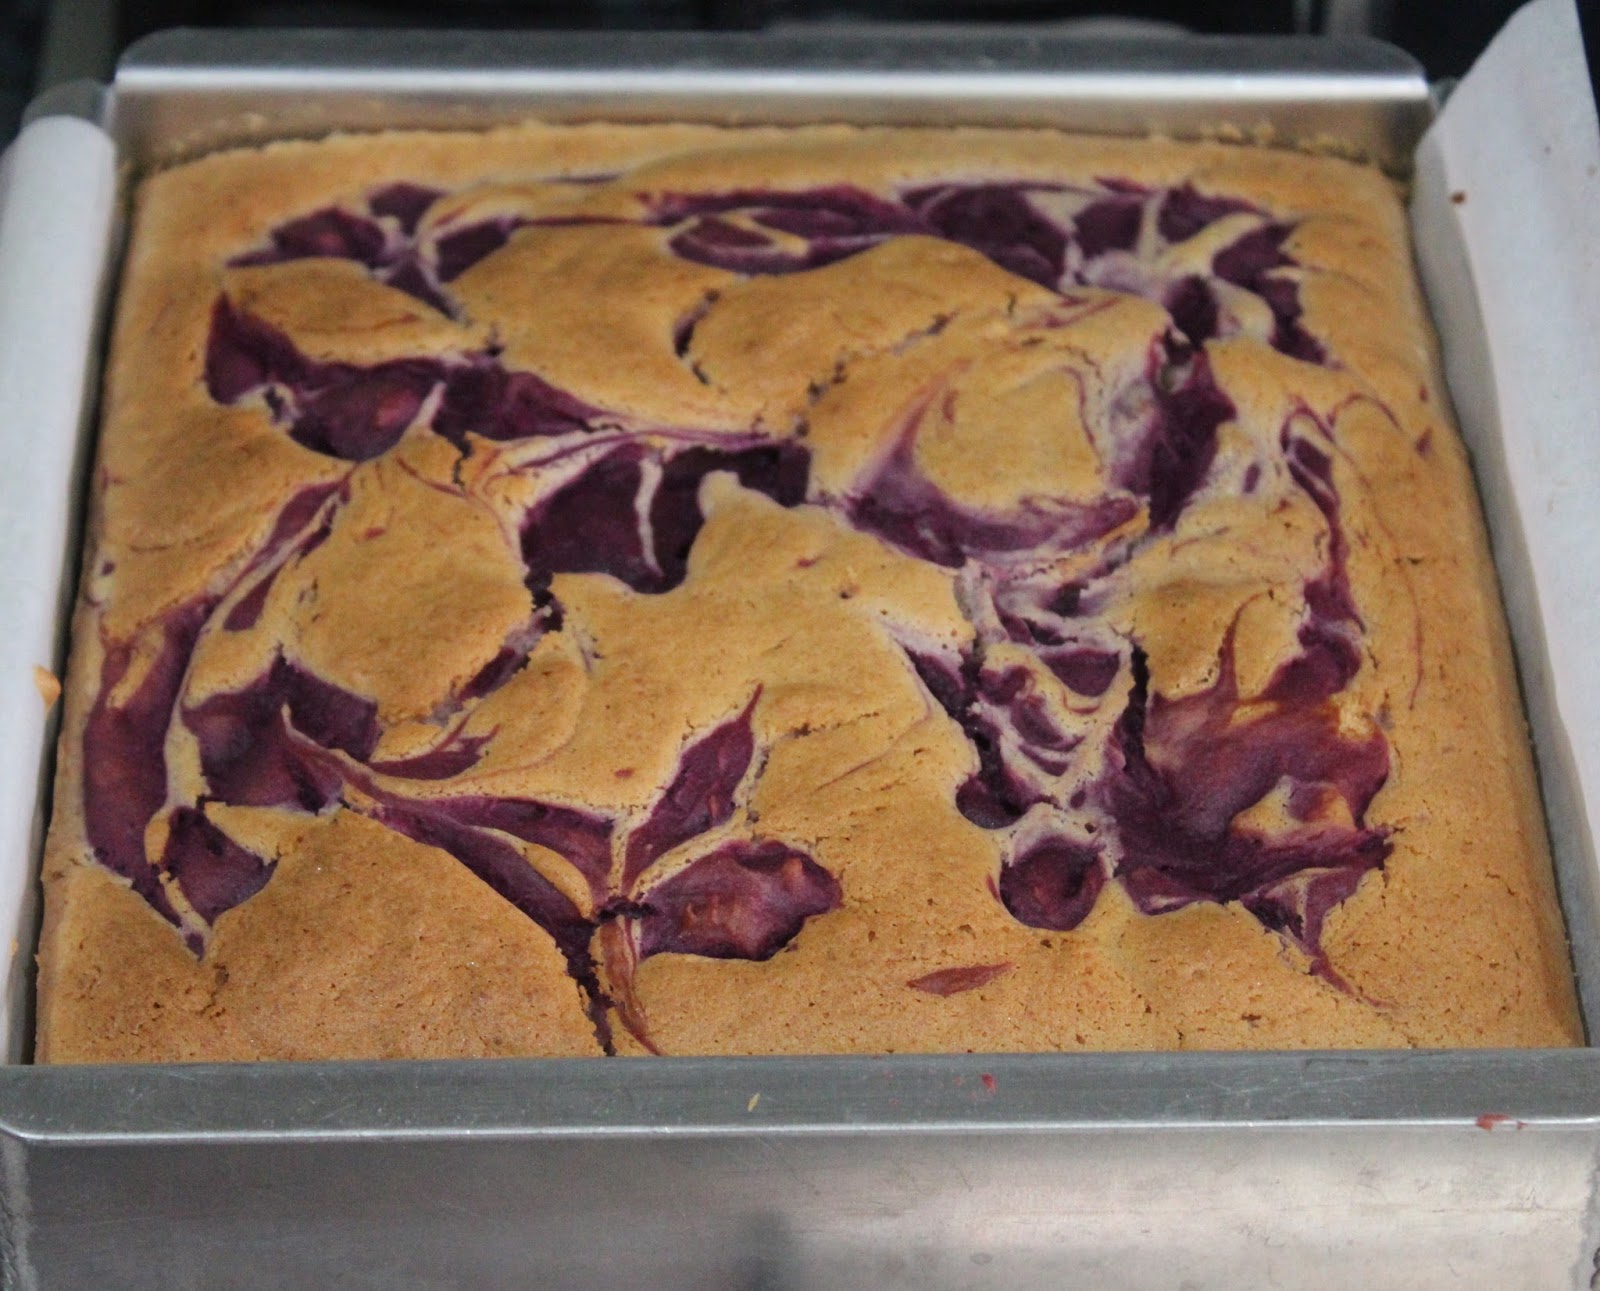
  • Scoop spoonfuls of the sweet potato cream puree over the top of the cake batter. Then using a tooth pick, run it through the batter to create that swirl effect.


  • Steam bake the cake in the preheated oven for 55-60 minutes in the water bath till the cake tester or toothpick comes out clean. 


  • Once baked, carefully remove from the oven and place over a towel. Remove the cake from its cake pan and cool on the rack completely before slicing. Enjoy!


See...it's not that complicated right? Although I did add sweet potato in both the cake batter and as a topping. I think it adds that extra oomph and sweet potato intensity to it.

With the addition of coconut oil, it really brings out the coconut fragrance. A little goes a long way! And that purple sweet potato cream swirls not only beautifies the cake appearance, it also adds that creamy sweet potato bite, which is like a bonus every time!

A close look at the soft cake texture of this special butter cake. :9 It is not dense at all, moist and fragrant and also buttery rich that leaves you satisfied. Or maybe you're like me...I can't resist having 3 slices at one go... oops. :P

If you decide to give this a try, try making it ahead and let the cake rest overnight. I personally feel the cake taste better the following day. Just like any butter cake, the taste mallows out and somehow makes it more rich in taste and flavour the following day. Like magic...taste like magic too. Don't take my word for it, get your baking apron on and try it yourself. ;)

Okay guys, signing off now. Hope you all will like this recipe and drop me a note if you did try it ya? 

Remember, do what you love and stay happy!


Add to Cart More Info

Blueberry Cream Cheese Pound Cake (revisited)

Frankly speaking, I love simple bakes like butter cakes, pound or loaf cakes. They are easy enough to whip up within a couple hours and usually helps use up that particular ingredient in the pantry that has been sitting there for days. :P I mean who has time to make frosting and what not all the time, simple is the way to go for a quick craving fix. And save those icing (and calories) for special occasions if you ask me. This time round I have a block of cream cheese and some blueberries that I bought during a sale, sitting beautiful in my fridge for almost a week. Not good. Use them to bake cake? Great! And at the back of my mind, I remember I always, yes almost always, bake this Blueberry cream cheese pound cake recipe years back while I was in States. Yes, where blueberries were dirt cheap, so why not! This lovely recipe was adapted from Martha Stewart. :) So simple and yet so delicious! 

I decided to give this recipe I used for years a slight twig, reduce sugar, increase liquid amount. Result was great because using the sweetness of the blueberries itself instead of loading the cake with caster sugar was much better. And replacing the moisture from the sugar removed with none other then my beloved buttermilk. :9

Ingredients for Blueberry Cream Cheese Pound Cake (Makes a 10 cups / 8" bundt)
325 g cake flour
230 g unsalted butter, room temperature
200 g cream cheese, room temperature
4 large eggs
215 g caster sugar
1 tbsp pure vanilla extract
1/2 tsp salt
Zest of a lemon
1 tsp baking powder
150ml shaken buttermilk
1 cup fresh blueberries (frozen ones can be used too)
  • Preheat the oven at 180C and grease the bundt pan thoroughly.
  • In a large mixing bowl, cream the butter and cream cheese together till smooth.
  • Next add in the caster sugar and salt, beat till light and fluffy. It should take about 4 to 5 minutes. 
  • Crack in one egg at a time and mix well after each addition.
  • Add the vanilla extract and lemon zest, whisk for a minute.

  • Next shift in half of the cake flour and baking powder in. Mix till well combined. Then pour in the buttermilk, mix well again. Lastly, shift in the rest of the cake flour and incorporate well.
  • Toss the blueberries in 1 tbsp of plain flour, this will prevent the blueberries from clumping together when mixed into the batter. 
  • Now add the blueberries into the batter and gently fold in to combine.

  • Pour the batter into the prepared bundt pan and bake in the oven for 45 to 50 minutes or till the cake tester comes out clean.


  • I would suggest turning the baking pan at mid point of the baking time. Just to ensure the cake is evenly baked out.
  • Place cake on the rack to cool before slicing. :9
  • Cake can be kept at room temperature for 2 days, 3rd day it should be sent into the fridge if there is still any left. :)


Oh glorious cake! I can have a quarter of this! Okay, let's not get ahead of ourselves. :P Let's move on to see how the cake turned out inside. 
Check out the creaminess inside...woooooah! :D Taste? Not overly sweet as expected, which is just right for me. But feel free to up another 30-40 g of caster sugar if you like yours sweeter. Creaminess was spot on, melting emakents on every bite. Much love.
Need I say more? Guess not. You seriously have to try this out. If it is some bake that I have used for years and still further improved on it, must be that good! 

So what's stopping you? Try it out! Guarantee no regrets. ;) Yes, blueberries are still abundant now and creamcheese is still on sale!

Happy baking all!


Add to Cart More Info

Kumquat Preserve Butter Cake

It is interesting how people love having layered cakes during Chinese New Year. Yes, I am talking about Kueh Lapis. Don't get me wrong, I love lapis cake, but it is so time consuming and tedious to bake that I always shy away from it. The only time I taste it is when I visit other friends or relatives, or when my dear sister buys me one haha! And don't get me started on the calories! 

Anyway, I always opted for baking some other cakes every year. And this time I decided to try something citrus in lieu of the seasonal fruit, kumquat! Maybe Mandarin oranges next year mmmm... :P

So here we have it, Kumquat Preserve Butter Cake:
I got the inspiration to make Kumquat preserve from Wendy, Table For Two or More Thanks Wendy! Hers is marmalade version which she blends the sweetened kumquat halves. But I kept mine as halves and used it as topping for the cake. :)

Anyway here is the recipe for easy reference:

 Kumquat Preserves:
250g kumquats
250ml water
125g sugar

  •  Wash the Kumquats and half them. Remove all the seeds.
  • In a heavy duty sauce pot, place all kumquat halves and sugar in. Then add in the water and bring to a boil. Then simmer the mixture for 15 to 20 minutes.
  • masak till the kumquats are soft. Let cool before putting them in to clean sterilized jars.
 
I actually made this 2 weeks ahead when the kumquats were on sale. :D 

Now the  fun part, baking the butter cake! :9 Here is my recipe:
Ingredients for an 8" by 8" by 3" square size cake
250g unsalted butter, room temperature
150g caster sugar
5 large egg yolks
Zest of one orange
1 vanilla bean pod's seeds (or you can use pure vanilla extract, 1 tsp)
 250g cake flour
100ml fresh whole milk
1/4 tsp salt
1/2 tsp baking powder
5 egg whites
50g caster sugar

  • In a big mixing bowl, place the butter and caster sugar in and beat till light, fluffy and not grainy.
  • Add in one egg yolk at a time and continue beating after each addition.
  • Next you add in the the orange zest, vanilla bean seeds and continue to beat the mixture.
  •  
  • Shift in cake flour, salt and baking powder.  Continue to mix.
  • Then lastly add in the milk and combine. Then set aside and work on the egg whites.
  • Preheat the oven to 175C and grease and lined a 8"by8" square pan with parchment paper.
  • In another mixing bowl, add in all the egg whites and beat till foamy. Add in all the sugar and beat at high speed till stiff peaks.
  • Then combine the egg white mixture in 3 separate portions, fold in gently.
  •  
  • Then pour the batter into the prepared cake pan. Now you can top the cake batter with the Kumquat halves.
  •  

  •  and bake in the preheated oven for 50-60minutes, testing with toothpicks to make sure it comes come either clean or fine crumbs.
  • Remove from oven and let cool in the pan on a rack for 15 minutes before removing it or cutting it.
I cannot begin to tell you how awesome my kitchen smell at that emakent. :) Love baking butter cakes and citrus ones are even more wonderful!

Thin crusty sides which is perfectly browned and moist fluffy center with juicy kumquat halves to surprise you in some bites, :9
Yeah, I had to add in this close up shot of the bitten cake to show you how fluffy, moist and amazing this cake is heehee. :D Convinced? Try it then and also wowed your friends and relatives when you serve this up during the Chinese New Year gatherings. Wheeee!

Okay folks, got a midnight movie to catch...till next time, happy baking and eat well!


Add to Cart More Info

Assorted Multigrain Rice Bread (五糙米面包) and Orange Buttercake with Grand Marnier

As expected, once the kids' exams are over, I'll be again tight down other stuff. I guess any SAHM will know that it's actually more hectic when your kids are free from school work and idling at home versus them busy with studies. :) But again, I welcome this, because at least the mood is more relax and the kids can have loads of fun at home or out. I am so looking forward to our little getaways, friends to meet and places to go (not to mention all that eating and shopping, lol!) So you probably will see much less posts from me this month...I'll be lucky if I can put up another post before end of November!(*.*) BTW, this will be a super long post (greedy me), so bare with me...

Anyway, back to today's post. I have again baked another healthy bread loaf this week and very eager to share with you all (despite skipping through all those backlogs!). I got this fabulous recipe, Assorted Multigrain Rice Bread (五糙米面包), from my favorite bread recipe book, "Natural Breads Made Easy", which mainly uses the pre-fermented dough technique. Long wait of 17hours but all worth while when you taste the delicious end product.
I am such a huge fan of bread making...but mostly soft Asian breads, because of it's soft fluffy texture plus my kids love eating them. Again this technique did not disappoint, the bread was again soft, bouncy and delicious. Even with the addition of the multigrain rice, the bread texture was still light and fluffy. Although there are still bits of grains (which I think it adds wonderful texture), my kids still chow down the bread happily, not knowing the wholesome goodness it has for them.

Ingredients for Assorted Multigrain Rice Bread (五糙米面包): (Makes 2 loaves 9x4x5)
Pre-ferment Dough:
404g bread flour
231ml water
12g fresh yeast (I used 6g active dry yeast)
6g salt
12g skim milk powder

Dissolve the yeast in water. Add bread flour, sea salt, skim milk powder and knead until soft. Cover the dough in cling wrap or a big zip log bag. Refrigerate to let it prove for 17 hours.


Main Dough:
173g bread flour
6g sea salt (I added only 3g)
58g caster sugar
144ml water
3g fresh yeast (I used 3g active dry yeast)
40g unsalted butter
231g masaked multi-grain rice
Note: I bought my mutligrain rice from Sheng Siong in Singapore. Here is a picture of it. Product is from Taiwan.
masak your multigrain rice in your rice masaker and set to brown rice option (if there is). The masaked rice should look like this:
You can very well masak this the day before and chill it together with your pre-ferment dough in the fridge. Remember not to add hot steamy rice to your dough when mixing, let it cool before use.


Method:
  • Knead all ingredients of the main dough together, except the butter. Add pre-ferment dough piece by piece. Knead after each addition until soft and smooth. Add butter. Knead until stretchable and pass the window panel consistency.
  •  
  • Put the dough into a big bowl. Cover with cling wrap and let it prove for 30minutes till double.
  • Divide the dough into 2 equal portions. Each halve should weigh about 600g. With one of the portion, divide into 8 equal rounds.  Flatten each portion and roll round, sealing any edges. Repeat for the rest of the dough portions.P lace the 8 round doughs into the loaf tin and let proof. 
  • As for the other 600g dough portion, you can either bake another loaf or make egg mayo buns like me.
  • I again divide 600g into 10 equal dough portions of 60++g. Flatten, roll round and seal and edges. Place in the paper liners to proof. Make an indent in the center using aluminium tins(optional). Scoop the egg mayo in to the cavity and contiue to proof till double in size.
  • As for the loaf dough, let it prove for about 45 minutes or until the dough has risen to 90% of the depth of the loaf tin. You can either cover the lid or bake it open top. If open top, brush with egg wash (I didn't do that because I want it to be vegetarian version). Bake in 175C for 30 to 35minutes.
Instead of making 2 loaves, I made some egg mayonnaise buns for my parents and sisters with the other loaf portion.
I love the way I shaped the dough this time...with all the bumps on top makes the bread loaf even more "attractive", hahaha!
I think I might have slightly under baked the loaf a little this time. Perhaps another couple more minutes in the oven would have brown the sides more nicely. However the inside was still very fluffy and nice...doesn't this photo makes you want to try it out yourself? (^.^)

I am going to be a little ambitious today and post up another recipe. It's actually a simple everyday cake, Orange Buttercake with Grand Marnier. I guess the Grand Marnier part is probably not an everyday thing though, lol! Bought this large bottle of Grand Marnier at DFS and trying to find ways to use it, so decided to spike the orange buttercake!
This recipe is actually a favourite of mine which I have used over and over again. The first recipe was my Passion Fruit Yoghurt Pound Cake, which I did years back. Then I modified it to using sour cream (I only had sour cream that time!) version; Passion Fruit Sour Cream Cake. I figured replacing the passion fruit with orange will be no biggy and the texture should be equally yummy. And I was right!
Ingredients for Orange Buttercake with Grand Marnier: (makes 2 loaves of 7x3,5"x3.5")
150g plain flour
150g cake flour
215g caster sugar
2 tsp baking powder 

220g unsalted butter, room temperature
4 eggs
100g low fat sour cream
70ml fresh milk

Zest of 1 large orange 
Juice of 1 large Navel Orange
2 tbsp Grand Marnier
pinch of salt


Method:
  • Preheat the oven to 180°C. Butter and line a loaf tin with parchment paper and butter it again. (I used a 7" by 3.5" loaf tin )
  • In a mixing bowl, beat butter, orange zest and sugar together till light and fluffy.
  • Add eggs, one at a time till well mixed in.
  • Add in sour cream and stir till incorporated. Then add in the orange juice and mix well.
  • Add in flour, baking powder and salt and stir till just blend in.
  • Pour the cake batter into the loaf tin and bake for 40 to 45 mins or till the cake tester comes out clean.
  • Cool on rack before slicing.
With the addition of sour cream, this cake is indeed lighter then other buttercake. Fine crumbs and melt in your mouth texture is the winning points for me to go back to this recipe over and over again. Love the orangy citrus scent although not overly powering. I added bittersweet chocolate chunks into one of the loaf. Orange + chocolate = perfect marriage! No worries about the addition of alcohol in the cake batter if you are serving this to young kids, it's probably all evaporated in the baking process. :)

Okay, shan't go much further to make this any longer! Hope this two homey bakes will trigger you to bake them for your love ones over the weekend. ;) Before I forget, Happy Deepavali to all my dear Indian friends and readers out there! 

Cheers!


Add to Cart More Info