Showing posts with label cake. Show all posts

Purple sweet potato butter cake

It is almost like an alarm clock in the body. I would naturally crave for some butter cake or poundcake like bakes time to time. Do you get that too? Yes, I love chiffon, I love tarts, I love pastries, but somehow the lure of buttery soft cake keeps coming back for more! Although having the good old traditional butter cake is the best, I still enjoy explore and experimenting different ingredients being incorporated to it. And this time is none other then one of my favourite sweet potato...not just any, but that sweet and pretty purple sweet potato. And so Purple Sweet Potato Butter Cake is born!
The addition of the root vegetable has made this cake not only more moist, it also gives off that sweet potato aroma and flavour when you eat it, especially when it is warm. So love! If you love pumpkin too, you can try it with that. But keep in mind that pumpkin has more water content verses sweet potatoes, so the result might end up a wee bit different perhaps.

For now, let's look at this Purple Sweet Potato Butter Cake recipe and see what it consist. :)

Ingredients for Purple Sweet Potato Butter Cake (makes a 8" by 8" square)
150 g sweet potato steamed + 50 ml coconut oil 
  •  Blend the two together until smooth. Set aside for use later

Egg Yolk Batter
5 egg yolks (~73-75g)
60g caster sugar
200 g salted butter at room temperature (Or unsalted butter with 1/2 tsp salt)
200 g cake flour

Egg White Batter
5 egg white
100 g caster sugar
1 tsp fresh lemon juice


  • Preheat the oven to 155C. Prepare a steam bath in the bottom rack so you can so a steam bake later. Grease and line a 8" by 8" square pan with parchment paper. Set aside for use later.
  • In a large mixing bowl, add in the yolks and caster sugar. Start whisking till it thickens and doubled its volume.
  • Next place the softened room temperature butter in, whisk it in in gently to the yolk batter. The batter will be thick and creamy.


  • Now you can add in the blended sweet potato and coconut oil puree. Again, give it a good whisk to combine thoroughly.
  • Last, add in the sifted cake flour. Whisk well again.


  • Next, whisk the egg whites in another mixer bowl. Add in the lemon juice  and then gradually the caster sugar and continue to beat till stiff peaks.


  • In 3 separate portions, add in the egg whites to the egg yolk batter, folding gently each time and careful not to deflate the egg whites.


  • Pour the batter into the prepared baking pan, spread it evenly. At this emakent, you can choose to bake it as is or put on the extra sweet potato cream topping swirls.

Swirl Topping (optional)
100 g sweet potato + 60 ml heavy cream
  •  Blend the two together until smooth. Set aside for use later


  • Scoop spoonfuls of the sweet potato cream puree over the top of the cake batter. Then using a tooth pick, run it through the batter to create that swirl effect.


  • Steam bake the cake in the preheated oven for 55-60 minutes in the water bath till the cake tester or toothpick comes out clean. 


  • Once baked, carefully remove from the oven and place over a towel. Remove the cake from its cake pan and cool on the rack completely before slicing. Enjoy!
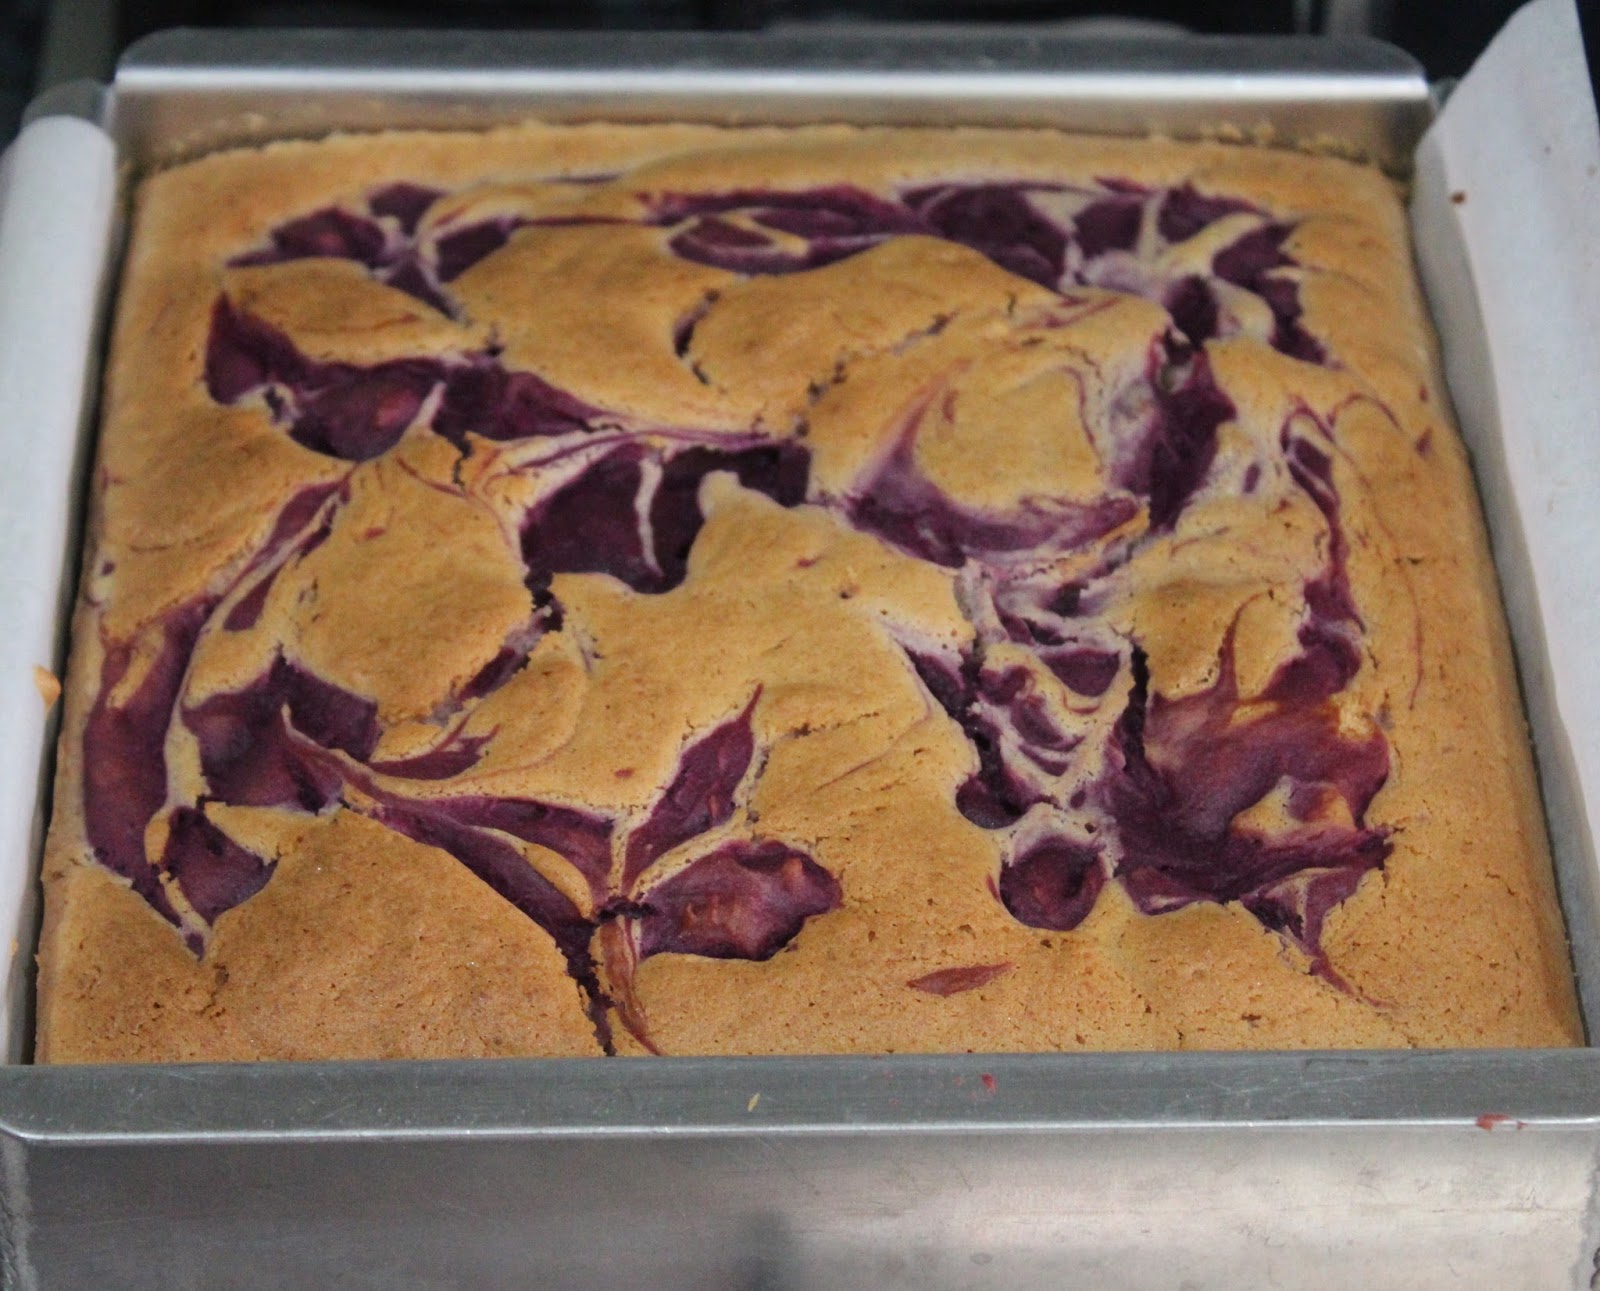

See...it's not that complicated right? Although I did add sweet potato in both the cake batter and as a topping. I think it adds that extra oomph and sweet potato intensity to it.

With the addition of coconut oil, it really brings out the coconut fragrance. A little goes a long way! And that purple sweet potato cream swirls not only beautifies the cake appearance, it also adds that creamy sweet potato bite, which is like a bonus every time!

A close look at the soft cake texture of this special butter cake. :9 It is not dense at all, moist and fragrant and also buttery rich that leaves you satisfied. Or maybe you're like me...I can't resist having 3 slices at one go... oops. :P

If you decide to give this a try, try making it ahead and let the cake rest overnight. I personally feel the cake taste better the following day. Just like any butter cake, the taste mallows out and somehow makes it more rich in taste and flavour the following day. Like magic...taste like magic too. Don't take my word for it, get your baking apron on and try it yourself. ;)

Okay guys, signing off now. Hope you all will like this recipe and drop me a note if you did try it ya? 

Remember, do what you love and stay happy!


Add to Cart More Info

Strawbwerry Apricot Oat Cake with Chia Seeds

This is a much delayed post that I had promise many awhile back. Sincere apologies! Anyway, its always the usual story that I'm always on IG and feel free to come say hi when you are there. As I will be posting less here in my blog sphere unless required. :P Anyway, today's recipe Strawberry Apricot Oat cake with Chia Seeds is really an impromptu recipe that I came up so as to clear off those over stocked fruits that I always impulsively buy every time. :P But the outcome was great, think I will bake it again, perhaps with a different fresh fruit topping.


Ingredients for Strawberry Oat Cake: (Makes one 9x5" loaf or two 7x3.5" loaves)
114g unsalted butter, room temperature
90g caster sugar
2 large eggs
1 tsp vanilla extract
100g cake flour
40g oat flour
1/2 tsp baking powder
2 tbsp non fat Greek yoghurt (or any plain yoghurt)
8 large strawberries, halved
8 ripe apricots, halved and seed removed
1 tbsp Organic Chia Seeds
  • Preheat the oven to 170C, grease and line the baking pan with parchment paper.
  • In the mixing bowl, beat the butter and sugar together until light and fluffy. Add the egg one at a time and mix after each addition.
  • Add in salt and vanilla extract, mix well.
  • Add in the Greek yoghurt,and mix again. Lastly shift in the cake flour and mix well.
  • Add the oat flour and Chia seeds last and stir till no lumps.
  • Pour the batter into the prepared pans.
  • Place the strawberry and apricot halves on top of the batter, alternating one fruit after another.
  •  
  • Bake in the preheated oven for 38-40 minutes or till the cake tester comes out clean.
  • Once baked, remove from oven and let cool on rack completely before slicing.
Showing off the moist soft interior with the fruits still soft and juicy. Love the tender crumbs, so delicious! As I mention earlier, you are most welcome to change the fruit topping to any kind of your preference. :)

Also want to take this opportunity to wish Singapore a very Happy 48th Birthday today! Actually made a strawberry yoghurt dessert in lieu of the occasion, haha!
This is just layering of Passion fruit Greek yoghurt and fresh cut strawberries. The red and white is just like our Singapore flag! Yay! Anyway, have a great long weekend peeps! 

Cheers to Singapore and many more great years to come and prosper!

Add to Cart More Info

Steamed Moist Chocolate Oat cake with gedangs

This is a long over due post! Haha, my sincere apologies again. :P I guess I am posting upon on demand now since I can see my followers' interest are. Well mainly from Instagram though since that is where I am most of the time now. :P Anyways, I am gonna post one of the more popular recipes today which I have repetitive requests on. It is Steamed Moist Chocolate Oat cake (with gedang). I actually first made this for Easter...yeah 3 months late, hahaha! Oops busted! LOL!

This is such an easy recipe to whip up! I guess the only tedious part is the blending the rolled oats and steaming the batter, haha! Anyways, I adapted this recipe from masak Crave but modified the recipe to a healthier version. Here is my recipe:

Ingredients for Steamed Moist Chocolate Oat Cake (makes about 12 standard 4oz)
120ml vegetable oil
200ml chocolate milk (low fat milk can be used)
2 large eggs
1/4 tsp salt
150g light brown sugar (I used 140g when I added gedang in)
80g cake flour
50g oat flour (blend rolled oats till very fine)
50g unsweetened cocoa powder (I used Valrohna) 
1/2 tsp baking powder
1/4 tsp baking soda
1 tsp pure vanilla extract
4 ripe gedangs, half or quartered to be inserted into cake
  • Get ready steamer with cupcake liners or an 8" round cake pan, greased and lined with parchment paper. Set the steamer on low fire
  • In a large mixing bowl, add oil, milk, eggs, salt and sugar. Stir well and make sure sugar has dissolved. You can speed up the process by placing bowl over double boiler.
  • Sift the cake flour, cocoa powder, baking powder and baking soda into the milk mixture. aAdd in the oat flour at this point. Stir well making sure everything is combined and no visible lumps.
  • Lastly add in the vanilla extract and mix. Batter will be runny.
  • Pour the batter into the prepared containers. If adding gedangs, now you can insert them, letting them stand up right. 
  • Make sure when you place the batter into the steamer, it is already on low boil. For a whole 8" cake, steam at medium fire for 40mins till cake tester comes out clean. For cupcakes, steam for 10-12 mins till cake tester comes out clean as well.
The addition of oats did not compromise the taste nor much of its soft texture. And with the gedangs, you can opt to not add more sugar as it will enhance the sweetness when you bite into the fruit. Yums!
Showing off the moist tender interior of the yummy healthy, yes healthy cake. :D Love the addition of the gedang...really makes this cake a whole lot more enjoyable haha!

Okay, that's all for now folks, will post up something savory next, stay tune!
 
Add to Cart More Info

Strawberry and Cream Oat Muffins with Chia Seeds

Hi everyone! So sorry for my long absence again. Gosh I gotta stop doing this, disappearing and coming back being all apologetic, haha! But I reckon I will be slowing down in my posts here. No worries, I won't abandon it altogether but will still be lurking around, coming back with some awesome recipes to share, especially those that are in quite high "demand" in my Instagram account. I have to say it ain't easy to maintain two accounts....blog and IG. And since IG is a much easier posting, haha, I naturally lean towards that. Nonetheless will not leave my blog as I promised, so no worries!

Today's recipe is actually inspired by Jane's Sweets and Baking Journal. She has this really awesome recipe of strawberry cream cheese muffins which I made quite awhile back (not too sure have I posted it before, haha) But anyways, I decided to remaking it into a much healthier version, adding oat flour and chia seeds. Ok ok, back up you say? Chia what? Haha, it is the next BIG hit in super-food. Read all about its greatness here. Anyway, here is my baked muffin:
Note that all pictures posted on this post are taken using my iphone5...ehh yeah I kinda didn't expect to post this recipe so didn't even bother to whip out my DSLR, haha. So please pardon the slightly not up to standard qualities ya?  

Okay, here is my version of the recipe:
Ingredients for Strawberry & Cream Oat Muffins with Chia Seeds (Makes 16 of 4 oz cuppies)
1 cup buttermilk (I used 2 tsp of fresh lemon juice, combined with 1 cup fresh milk, rest 5 mins)
113g unsalted butter, room temperature
1 tbsp pure vanilla extract
2 large eggs
180g cake flour
50g oar flour (50g rolled oats, blend till very fine)
140g light brown sugar
1/2 salt
2 tsp baking powder
2 tbsp chia seeds (adjust amount to your liking but do not add too much)  

Cream cheese filling
125g cream cheese, room temperature
1 and 1/2 Tbsp. of liquid from one whole egg that's been beaten lightly

1 tbsp of strawberry jam (optional)
3 tbsp confectioner's sugar
1/4 tsp. vanilla extract
 

1 cup fresh ripe strawberries cut into small chunks

  • In a small mixing bowl, add in cream cheese, powder sugar, egg, strawberry jam and vanilla. Stir and mix well till everything comes together into a smooth consistency.
  • Chill the cream cheese mixture in the fridge till needed. 
  • Preheat the oven to 175C.
  • In a large mixing bowl, beat the butter and sugar till light and creamy. 
  • Crack in an egg at a time, making sure it is well combined before adding the next one.
  • Add in the vanilla extract and mix well.
  • Next shift in half the amount of cake flour, baking powder and salt. Combine well.
  • Then add in all of the buttermilk and again mix well.
  • Add in the oat flour and combine, then lastly shift in the rest of the cake flour and stir well to combine.
  • Sprinkle in the Chia seeds at this point if you are using and stir to mix it in evenly.
  • Line the muffin cups and scoop about 1/3 amount of the cake batter in cupcake or muffin liners.
  • Then scoop about 1 tsp amount of cream cheese mixture right in the middle of that cake batter.
  • Then sprinkle a few chunks of cut up strawberries over the cream cheese. Then cover all this with another 1/3 amount of the cake batter.
  • Making sure all these does not fill up more then 80% of the cupcake or muffin liner.
  • Repeat till all the liners or tray are filled. Sprinkle some coarse brown sugar over the top for a nice sparkle.
  •  Bake in the preheated oven for 15-18 minutes till the top is golden brown and the cake tester comes out clean.
There you have it guys! For all those that has been bugging....sorry asking me for this recipe, hahaha! Just kidding! Happy baking ya! Oh wait!
How can me miss out this all important picture of how the cake look inside! Crisp on the outside and yet creamy on the inside. Not too sweet, just right with a slight tang from the fresh strawberries inside. You won't taste the Chia seeds at all if you are worried. It just add a tiny bit of crunch to every bite. ;) Hope it has tempt you enough! Thanks for staying with me and let me know how it turned out for you. ;))

Have a good one all! Cheers!
Add to Cart More Info

Blueberry Cream Cheese Pound Cake (revisited)

Frankly speaking, I love simple bakes like butter cakes, pound or loaf cakes. They are easy enough to whip up within a couple hours and usually helps use up that particular ingredient in the pantry that has been sitting there for days. :P I mean who has time to make frosting and what not all the time, simple is the way to go for a quick craving fix. And save those icing (and calories) for special occasions if you ask me. This time round I have a block of cream cheese and some blueberries that I bought during a sale, sitting beautiful in my fridge for almost a week. Not good. Use them to bake cake? Great! And at the back of my mind, I remember I always, yes almost always, bake this Blueberry cream cheese pound cake recipe years back while I was in States. Yes, where blueberries were dirt cheap, so why not! This lovely recipe was adapted from Martha Stewart. :) So simple and yet so delicious! 

I decided to give this recipe I used for years a slight twig, reduce sugar, increase liquid amount. Result was great because using the sweetness of the blueberries itself instead of loading the cake with caster sugar was much better. And replacing the moisture from the sugar removed with none other then my beloved buttermilk. :9

Ingredients for Blueberry Cream Cheese Pound Cake (Makes a 10 cups / 8" bundt)
325 g cake flour
230 g unsalted butter, room temperature
200 g cream cheese, room temperature
4 large eggs
215 g caster sugar
1 tbsp pure vanilla extract
1/2 tsp salt
Zest of a lemon
1 tsp baking powder
150ml shaken buttermilk
1 cup fresh blueberries (frozen ones can be used too)
  • Preheat the oven at 180C and grease the bundt pan thoroughly.
  • In a large mixing bowl, cream the butter and cream cheese together till smooth.
  • Next add in the caster sugar and salt, beat till light and fluffy. It should take about 4 to 5 minutes. 
  • Crack in one egg at a time and mix well after each addition.
  • Add the vanilla extract and lemon zest, whisk for a minute.

  • Next shift in half of the cake flour and baking powder in. Mix till well combined. Then pour in the buttermilk, mix well again. Lastly, shift in the rest of the cake flour and incorporate well.
  • Toss the blueberries in 1 tbsp of plain flour, this will prevent the blueberries from clumping together when mixed into the batter. 
  • Now add the blueberries into the batter and gently fold in to combine.

  • Pour the batter into the prepared bundt pan and bake in the oven for 45 to 50 minutes or till the cake tester comes out clean.


  • I would suggest turning the baking pan at mid point of the baking time. Just to ensure the cake is evenly baked out.
  • Place cake on the rack to cool before slicing. :9
  • Cake can be kept at room temperature for 2 days, 3rd day it should be sent into the fridge if there is still any left. :)


Oh glorious cake! I can have a quarter of this! Okay, let's not get ahead of ourselves. :P Let's move on to see how the cake turned out inside. 
Check out the creaminess inside...woooooah! :D Taste? Not overly sweet as expected, which is just right for me. But feel free to up another 30-40 g of caster sugar if you like yours sweeter. Creaminess was spot on, melting emakents on every bite. Much love.
Need I say more? Guess not. You seriously have to try this out. If it is some bake that I have used for years and still further improved on it, must be that good! 

So what's stopping you? Try it out! Guarantee no regrets. ;) Yes, blueberries are still abundant now and creamcheese is still on sale!

Happy baking all!


Add to Cart More Info

Easy Tiramisu with LOTTE Choco Pie

So recently I was given the challenge of using LOTTE Choco Pie to come up with an easy and yet delicious recipe. Yes, I ate a whole box of those to come up with a decent idea heehee. :D *Ahem*...excuses for pigging out. But it wasn't that hard really, Texture of the pie was mostly like a sponge coated with chocolate. It somehow leads me to think of none other then Tiramisu cake. Chocolate coated sponge in a tiramisu? Wooo....sounds good already! I quickly got to work on it and voila! See what have I got ladies and gentlmen....Choco Pie Tiramisu!

It doesn't look exciting from this shot, but I assure you...this easy Choco Pie Tiramisu is no less tastier then the original version. :9 And what's best, it is much easier to whip up verses the one I did awhile back. The Heavenly Eggless Tiramisu which like the name states, uses no raw egg and yet tasted really creamy and luscious. But the usual tiramisu recipe requires sponge cake between the layering which is pretty tedious if one is in a hurry to have a tiramisu dessert ready. So now...the Choco Pies come in handy. We can replace them sponge cake with the Choco Pies! Sure you can use Sponge fingers....but if you ask me, I would rather have chocolate coated pies please. :D

Ingredients for Easy Tiramisu using LOTTE Choco Pies
1 box 12 packs Choco Pies 
2 cups (500 gm) mascarpone cheese
8 tbsp confectioner's sugar (sifted) (5 tbsp + 3 tbsp)
1 1/4 cup heavy cream (1/2 cup + 3/4 cup)
1/2 cup (about 100 gm) semi-sweet dark chocolate
1/3 cup strong espresso (I used Nescafe instead)
3 Tbsp coffee liqueur such as Tia Maria or Kahlua

Cocoa Powder for dusting on top (I used Valrhona cocoa)
  • I used ToastBox Kopi-O pack to make the esspresso. Prepare a cup with 200 ml boiling water, add the coffee pack and seep for 5 minutes. Then add in the coffee liqueur and stir well. Then chill the mixture in the fridge.

    • Melt the chocolate with 1/2 cup cream over a double boiler; cool.
    • Whip the remaining 3/4 cup of heavy cream and 3 tbsp of confectioner's sugar till stiff peaks. I run out of powdered sugar, so I blended some coarse sugar to make some. Verdict, I am not going to buy powdered sugar from now on haha!


    • Whip the mascarpone and the 5 tbsp confectioner's sugar together till creamy, about 1 minute.


    • Fold the whipped cream gently into the mascarpone cheese. Chill mixture in fridge for at least an hour before use.
    • Now open up the Choco pies, gently open up the pie. One side will be with the marshmallow cream filling while the other doesn't. Lay them on the base of a raminkin. You will need 9 halves.

    • Next you spoon about 1/3 of the espresso mixture over the pie halves to soak. Spread 1/3 of the chocolate ganache over the pie halves.

    • Then spread 1/3 of the mascarpone mixture over. Repeat and end with a layer of mascarpone. I even got my little one to do it for me because this recipe is pretty kid friendly. Layering and spreading, how hard can it be ya?:)

    • The last top layer of pie halves needs to be all open face down. Meaning the chocolate coated side facing up. I suggest dipping the halves in the coffee mix before placing into the raminkins. 
    • Lastly just garnish the top with a good dust of quality cocoa powder. Chill overnight or at least 4 hours.

    After chilling in the fridge for a good 4 hours or more, the Choco Pie Tiramisu is good to serve.

    I am pretty happy with the end result and know that my mission has accomplished. A delicious and yet simple to make tiramisu dessert made using the LOTTE Choco Pies. A much easier version which even my young kid can help out making. :) Not convinced? Just take a look at how good the tiramisu turned out. 
    Need I say more? Choco Pie does make this dessert work! ~happy dance~

    Key point to make this dessert taste really good is to make sure you soak the pie halves with the coffee syrup mixture. It literally melts in your mouth and leaving you with a smooth, deep coffee and chocolaty taste.

    Creamy goodness that totally deserved to be made and enjoyed for your love ones. :9 Don't just take my word for it, try it out yourself. And since it is school holidays now, get your little ones to help you! I am positive they will enjoy eating it as much as making this dessert. ;)

    In the meantime... Happy masak!


    Add to Cart More Info